Double the Fun  Creative Ways to Use Bunk Beds in Your Home

Double the Fun Creative Ways to Use Bunk Beds in Your Home

You’re likely familiar with bunk beds as a space-saving solution for kids’ bedrooms, but have you ever considered their potential beyond just sleeping? With a little creativity, bunk beds can become so much more. Imagine a cozy reading nook, a home office, or even a hideout for kids (or adults!) to escape into. By incorporating clever design elements and styling tricks, you can unlock the full potential of bunk beds and turn them into multi-functional hubs that cater to your unique needs and style. But how do you get started?

Bunk Bed Design Inspiration

Get ready to turn your bunk bed vision into a reality! You’re about to dive into the exciting realm of design inspiration.

As you start planning, consider the overall aesthetic you want to achieve. Do you prefer modern and sleek, rustic and cozy, or perhaps a mix of both? Think about the color palette, too. Will it be bold and bright, or soft and calming?

Next, think about the bed’s functionality. Will it be a simple, no-frills design, or do you want to incorporate clever features like built-in storage, reading nooks, or a desk?

You might also consider the type of bunk bed you want – a classic twin-over-twin, a loft bed, or even a trundle bed. Research different designs online, and create a Pinterest board or vision board to collect your favorite ideas.

You can also draw inspiration from furniture stores, home decor magazines, or even your friends’ homes. The key is to have fun and be creative!

Multi-Functional Room Solutions

Now that you’ve got your design inspiration, it’s time to think about how your bunk bed will function.

You want it to be more than just a place to sleep – you want it to be a multi-functional room solution. Consider adding built-in storage units, like shelves or cabinets, underneath the bed or along the walls to maximize storage space.

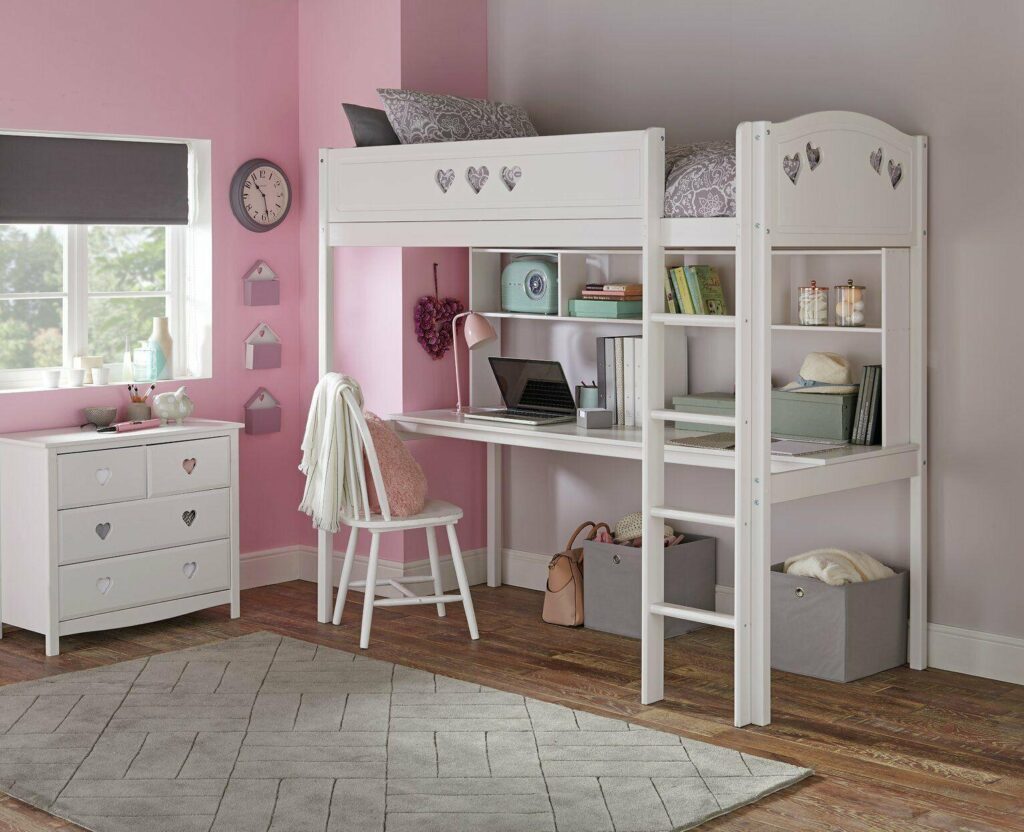
If you’re planning a home office or study area, think about incorporating a desk or workspace into the design. You could add a Murphy desk that folds up when not in use or a built-in shelf for a laptop or computer.

For a playroom or game room, consider installing a bunk bed with built-in cubbies for toys or games. Whatever your needs are, there are creative ways to make your bunk bed a functional and efficient space.

Space-Saving Ideas for Small Rooms

In compact spaces, every square foot counts, and a bunk bed can be a lifesaver.

By installing a bunk bed, you’re essentially creating two sleeping areas in the space of one, freeing up floor space for other essential items.

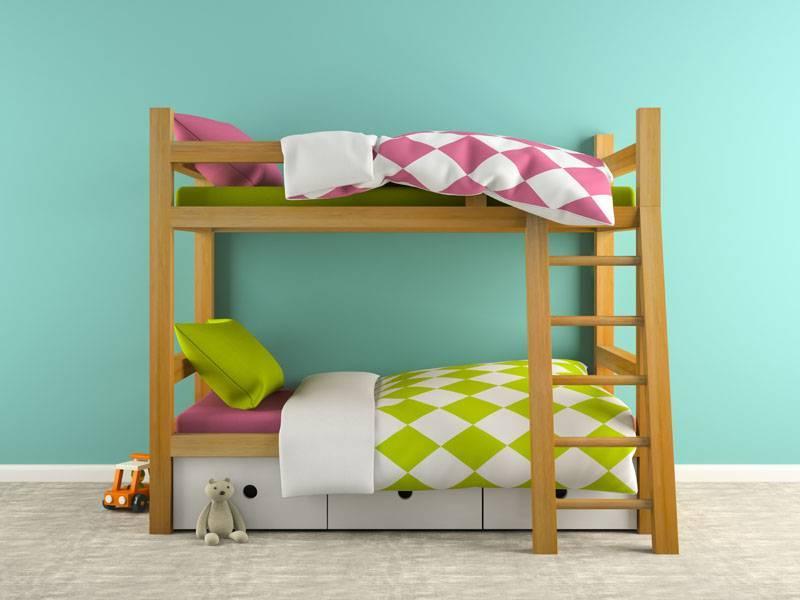
Consider a bunk bed with built-in storage, like drawers or cabinets, to keep clutter at bay.

If you’re dealing with an oddly shaped room, look for a custom bunk bed design that can be tailored to fit your unique needs.

You can also use bunk beds to create a cozy reading nook or home office beneath the bed frame.

For really tight spaces, opt for a wall-mounted or Murphy bunk bed that can be easily stowed away when not in use.

Whatever your space constraints, there’s a bunk bed solution that can help you make the most of your square footage.

Bunk Bed Styling Tips and Tricks

You’ve optimized your compact room with a space-saving bunk bed – now it’s time to focus on making it visually appealing.

The right styling can transform your bunk bed from a functional piece of furniture to a showstopper. Start by selecting a cohesive color scheme and incorporating it into your bedding, curtains, and walls.

Don’t be afraid to mix and match patterns and textures to add depth and visual interest.

Next, add some personality with decorative accents like throw pillows, wall art, or rugs.

These small touches can make a big impact on the overall aesthetic of your room.

Consider adding some greenery, like a potted plant or a vase with fresh flowers, to bring a touch of nature indoors.

Unconventional Bunk Bed Uses

Beyond their traditional use as a sleeping solution, argos loft bed can take on surprising roles in your home.

You mightn’t think of bunk beds as a storage solution, but they can be! Consider converting the bottom bunk into a storage unit or adding drawers underneath the bed frame. This is especially handy in small homes or rooms where storage is limited.

You can also repurpose a bunk bed as a cozy reading nook or a home office. Simply add a comfortable chair, a floor lamp, and some decorative elements, and you’ve got a quiet retreat.

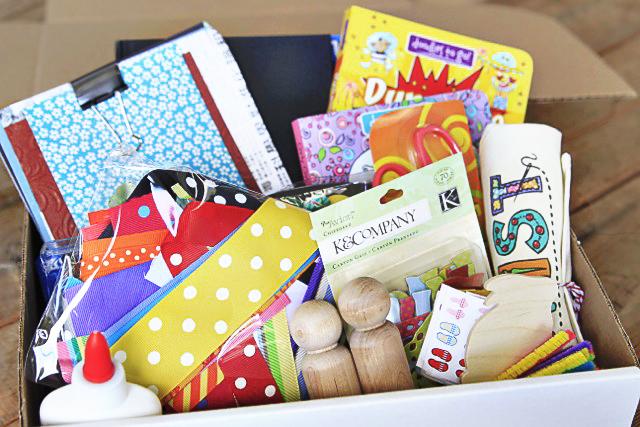
Alternatively, you can use a bunk bed as a play area for kids. Add some colorful curtains, a few pillows, and some fun toys, and you’ll create a playful hideout.

If you’re feeling crafty, you can even upcycle an old bunk bed into a unique piece of furniture, like a desk or a bookshelf. With a little creativity, the possibilities are endless!

Conclusion

You’ve seen the possibilities – now it’s time to get creative! With a little imagination, bunk beds can become so much more than just a place to sleep. From multi-functional hubs to playful hideouts, the options are endless. Whether you’re maximizing space, incorporating storage, or simply adding style, bunk beds offer a world of possibilities. So go ahead, think outside the box (or bed frame!), and turn your bunk bed into a functional work of art that doubles the fun in your home.

Accessorizing Your Bunk Bed  From Ladder Covers to Curtains

Accessorizing Your Bunk Bed From Ladder Covers to Curtains

As you consider upgrading your bunk bed, you’re probably thinking beyond the basics. You want a space that’s not only functional but also inviting and personalized. That’s where accessorizing comes in. You’ve got a blank canvas waiting to be transformed, and it starts with the little details. From ladder covers that add comfort and style to curtains that create a cozy nook, every element counts. But where do you even begin? Take the first step, and you’ll soon discover how these thoughtful touches can turn your bunk bed into a retreat that’s all your own.

Ladder Covers for Comfort and Style

As you ascend to your cozy bunk bed, the ladder’s cold, hard rungs can be a jarring contrast to the warmth and comfort of your bedding.

To eliminate this discomfort, consider investing in a ladder cover. These covers come in various materials, such as soft fabric, foam, or even carpeted surfaces.

They provide a cushioned grip, making it easier and more comfortable to climb up and down.

Additionally, ladder covers can add a touch of style to your bunk bed.

You can choose from a range of colors, patterns, and designs that match your bedroom’s aesthetic.

Some ladder covers even feature fun designs, such as cartoon characters or bright stripes, which can be perfect for kids’ rooms.

When selecting a ladder cover, make sure it’s easy to clean and maintain.

Some covers are machine washable, while others require spot cleaning.

Regardless, a ladder cover is a simple yet effective way to enhance the comfort and style of your bunk bed.

Adding a Touch With Bed Skirts

With your ladder cover in place, it’s time to focus on the often-overlooked area beneath your bunk bed.

This space can easily become a cluttered mess, but with a bed skirt, you can add a touch of style and keep the area tidy. Bed skirts come in a variety of materials, from cotton to linen, and can be matched to your bedding or ladder cover for a cohesive look.

When choosing a bed skirt, consider the length and style of your bunk bed.

You’ll want a skirt that reaches the floor to create a clean, finished look. If you have storage bins or baskets underneath your bed, look for a skirt with a split corner or a removable panel for easy access.

To install your bed skirt, simply slide it over the mattress and tuck it under the bed frame.

You can use bed skirt pins or clips to keep it in place. With a bed skirt, you’ll add a polished touch to your bunk bed and create a cozy atmosphere in your bedroom.

Creating Cozy Corners With Curtains

You can turn the often-neglected corners of your cabin bed with integrated stairs into cozy retreats by hanging curtains around them. This simple addition can create a sense of privacy and comfort, making the space feel more intimate and inviting.

Choose curtains that match your bedding or complement the room’s decor to ensure a cohesive look.

To hang your curtains, you’ll need a curtain rod or track that fits snugly around the corner of your bunk bed. You can opt for a tension rod, which is easy to install and requires no drilling, or a more permanent solution like a screw-mounted track.

Make sure to measure the space carefully to ensure your curtains fit perfectly.

Consider adding tiebacks or tassels to your curtains to give them a more polished look.

You can also add a few decorative pillows or a cozy throw blanket to make the space feel even more inviting.

Personalized Bedding for a Pop

Behind the bedding, a world of personalization awaits.

You can turn your bunk bed into a reflection of your personality with customized bedding. Start with the comforter or duvet cover – choose a bold pattern or vibrant color that matches your style.

Add some personalized pillowcases with your name, initials, or a fun design. You can even find bedding with your favorite cartoon character or superhero.

Don’t stop at the bedding itself – consider adding some decorative throw pillows or a blanket with a special message.

If you’re feeling crafty, you can make your own personalized bedding with fabric paint, iron-on transfers, or embroidery. This is a great way to add a personal touch without breaking the bank.

Remember, the key is to have fun and express yourself! With personalized bedding, you’ll feel like you’re sleeping in your own little world.

Lighting Up the Loft Space

Above the mattress, a cozy atmosphere awaits creation.

You can turn your bunk bed’s loft space into a relaxing retreat with the right lighting. String lights or fairy lights are a great option, adding a warm and intimate ambiance to the area.

You can hang them from the ceiling or wrap them around the bed’s frame.

If you prefer a more focused light source, consider installing a reading light or a desk lamp.

This will provide a cozy nook for reading, studying, or simply enjoying some quiet time.

You can also add some ambiance with a Himalayan salt lamp or an essential oil diffuser, which can promote relaxation and calmness.

Don’t forget to consider the type of bulbs you use.

Warm white or soft blue bulbs can create a calming atmosphere, while bright white or daylight bulbs can help you stay focused and alert.

Whatever lighting option you choose, it’s essential to ensure it’s safe and secure to avoid any accidents or hazards.

With the right lighting, you can create a cozy and inviting space that’s perfect for relaxation and unwinding.

Conclusion

Now that you’ve accessorized your bunk bed, you’ve transformed it into a cozy retreat that’s both functional and stylish. With ladder covers for comfort, bed skirts for tidiness, curtains for privacy, and personalized bedding that reflects your personality, you’ve created a space that’s uniquely yours. Finally, by adding the perfect lighting, you’ve set the tone for a relaxing atmosphere that invites you to unwind and recharge.

Crafting Fun  Explore Our DIY Art Kit for Budding Artists

Crafting Fun Explore Our DIY Art Kit for Budding Artists

If you’re looking for a way to spark your child’s imagination, our DIY Art Kit might just be the solution. With a selection of vibrant paints and essential tools, it encourages young creators to experiment and express themselves. You’ll find everything needed to turn simple ideas into artistic projects, but that’s just the beginning. There’s also a world of creative techniques and inspiring project ideas waiting to be discovered, ensuring your budding artist never runs out of inspiration. What’s in the kit that could transform a blank canvas into a masterpiece? DIY Arts & Crafts Gift set.

Benefits of DIY Art Kits

DIY art kits offer a treasure trove of benefits for budding artists. You’ll discover that these kits inspire creativity and self-expression. When you dive into a DIY project, you unlock your imagination and explore new techniques and styles. Each kit is designed to help you learn as you create, making it easier to hone your artistic skills.

Another major benefit is convenience. You won’t have to worry about gathering supplies or figuring out what materials you need. Everything you require is conveniently packaged, allowing you to focus solely on your art. Plus, DIY art kits often cater to various skill levels, so whether you’re a beginner or looking to refine your skills, you’ll find something that suits your needs.

Engaging in art also has therapeutic benefits. It can reduce stress and anxiety while providing a sense of accomplishment as you complete each project. You’ll feel a rush of satisfaction when you see your finished work.

Lastly, these kits can foster a sense of community. You can share your creations with friends or join online groups, connecting with others who share your passion. Overall, DIY art kits are a fantastic way to unleash your creativity.

What’s Included in Our Kit

Inside our kit, you’ll find everything you need to ignite your artistic journey. We’ve carefully curated a selection of high-quality materials, ensuring you can dive right into your creative projects without any hassle.

Each item is chosen to inspire and encourage your imagination, making art accessible and fun.

Here’s what’s included:

  • A set of vibrant acrylic paints: These rich colors will bring your ideas to life on canvas or paper.
  • Brushes of various sizes: From fine details to broad strokes, you’ll have the right tool for every artistic need.
  • A sketchpad: Perfect for practicing your sketches or laying the groundwork for your masterpiece.
  • Instruction booklet: Packed with tips and suggested techniques, this guide will help you get started and experiment with your creativity.

With these essentials at your fingertips, you’re ready to explore new techniques and express yourself.

Whether you’re a beginner or looking to refine your skills, our kit provides a solid foundation.

Creative Techniques to Try

Dive into your artistic journey by experimenting with a variety of creative techniques that can enhance your skills and spark new ideas.

Start with mixing different mediums. Try combining watercolors with colored pencils or markers to achieve unique textures and effects. You might discover exciting contrasts that elevate your artwork.

Next, explore the technique of layering. Use transparent materials like tracing paper or acrylic glazes to add depth to your pieces. Layering can create stunning visuals and encourage you to think about composition in new ways.

Don’t forget about texture! Use everyday items—like sponges, brushes, or even your fingers—to apply paint. This not only adds dimension but also makes the process more tactile and enjoyable.

Another technique to try is doodling. Let your mind wander and fill the margins of your sketches with spontaneous lines and shapes. This can lead to unexpected inspiration and unique patterns.

Lastly, embrace the beauty of imperfection. Allow yourself to make mistakes and learn from them. These experiences often lead to the most innovative ideas, pushing your creativity further than you ever imagined.

Happy creating!

Inspiring Project Ideas

After experimenting with various creative techniques, it’s time to put your skills to the test with some inspiring project ideas.

These projects not only let you showcase what you’ve learned but also encourage you to explore new materials and methods.

Here are a few ideas to get your creative juices flowing:

  • Nature Collage: Gather leaves, flowers, and other natural materials to create a beautiful collage that celebrates the great outdoors.
  • Personalized Tote Bag: Use fabric paint or markers on a plain tote bag to design something unique that reflects your personality.
  • Miniature Sculpture: Use clay or recycled materials to make a small sculpture. It could be an animal, a favorite character, or even an abstract piece!
  • Storybook Illustration: Choose a favorite story or poem and create illustrations that bring the words to life. You can even make a mini book to showcase your artwork.

These projects will inspire you to think creatively and push the limits of your imagination.

Tips for Young Artists

Every young artist can benefit from some practical tips to enhance their creative journey.

First, don’t be afraid to experiment. Use your DIY art kit to try different materials, colors, and techniques. Mixing mediums can lead to exciting discoveries and unique creations.

Set aside dedicated time for art. Regular practice helps develop your skills and keeps your creativity flowing. Find a comfortable space where you can focus and let your imagination run wild.

Seek inspiration from the world around you—nature, books, and even your favorite shows can spark new ideas. Keep an art journal to jot down thoughts and sketch concepts whenever inspiration strikes.

Remember, mistakes are part of the process. Instead of getting discouraged, look at them as opportunities to learn and grow. Embrace your personal style; there’s no right or wrong way to create art.

Lastly, share your work with friends and family. Their feedback can be encouraging and help you see your art from different perspectives.

Celebrate your progress, no matter how small, and enjoy every moment of your artistic adventure!

Conclusion

With our DIY Art Kit, you’re giving your child the perfect opportunity to explore their creativity and develop new skills. Packed with everything they need, from vibrant paints to helpful tips, it’s designed to inspire and engage young artists. Encourage them to experiment with techniques and embark on exciting projects that ignite their imagination. Dive into the world of art together, and watch as they express themselves in colorful and unique ways!

Essential Natural Beard Oil for Daily Grooming

Essential Natural Beard Oil for Daily Grooming

You’re probably no stranger to the itchiness and irritation that can come with growing a beard. But what if you could say goodbye to those pesky skin issues and hello to a healthy, shiny beard that turns heads? Essential natural beard oil can be your ticket to achieving just that. With its rich antioxidant and moisturizing properties, it’s the perfect addition to your daily grooming routine. But what makes a good beard oil, and how do you use it to get the best results? You’re about to find out.

Benefits of Natural Beard Oils

Many men swear by natural beard oils, and for good reason.

You’re likely considering making the switch to natural beard oil, and you want to know what benefits you can expect.

One of the most significant advantages of natural beard oils is their ability to moisturize and condition your beard without leaving it feeling greasy.

You’ll notice your beard looks healthier, with a natural shine that doesn’t scream “product overload.”

Natural oils also help to soothe itchiness and irritation, which is especially important if you’re new to growing a beard.

Additionally, natural beard oils can help to keep your skin underneath healthy, reducing the risk of beard dandruff and flaking.

You’ll also appreciate that natural oils are often fragrance-free, making them a great option for those with sensitive skin.

Key Ingredients to Look For

When you’re on the hunt for a natural beard oil, you typically scan the ingredient list to ensure it’s free from harsh chemicals and artificial additives.

You want to see a list of recognizable, natural ingredients that will nourish and moisturize your beard. Look for oils rich in antioxidants like argan oil, jojoba oil, and sweet almond oil, which help protect your beard from environmental stressors and promote healthy growth.

You’ll also want to see ingredients like coconut oil, olive oil, and shea butter, which provide intense moisturizing properties to keep your beard soft and manageable.

Additionally, some natural beard oils may include essential oils like lavender, cedarwood, or sandalwood, which can help soothe and calm the skin underneath your beard.

Be wary of ingredients you can’t pronounce or recognize, and opt for oils with a short, simple ingredient list. By choosing a natural Natural Beard Oil with the right ingredients, you’ll be well on your way to a healthy, thriving beard.

Choosing the Right Scent

Choosing the Right Scent

Three key factors come into play when choosing the right scent for your natural beard oil: personal preference, skin type, and lifestyle.

You likely have a favorite fragrance or scent family that you’re drawn to, so consider what you already like. Do you prefer earthy, woody notes or bright, citrusy scents?

When it comes to skin type, if you have sensitive skin, you may want to opt for a fragrance-free or hypoallergenic option to minimize irritation.

Lifestyle also plays a role, as some scents may be more suitable for everyday wear while others may be better reserved for special occasions.

You’ll also want to think about the strength of the scent.

Do you prefer a subtle, understated fragrance or something bolder that makes a statement? Consider your daily activities and the environments you’ll be in while wearing the beard oil.

Will you be in close proximity to others, or working outdoors? By weighing these factors, you can find a scent that complements your unique needs and preferences.

How to Use Beard Oil Effectively

Your beard oil is only as good as the way you use it.

To get the most out of your natural beard oil, you need to apply it correctly.

Start by washing your beard with a gentle shampoo and towel-drying it until it’s damp.

This helps the oil absorb better into your skin and beard.

Next, dispense a few drops of oil into your palm, depending on the length and thickness of your beard.

Rub the oil between your palms to warm it up, and then massage it into your beard, focusing on the ends, which tend to be the driest.

Work your way up to the roots, making sure to cover every strand.

Be gentle, as you don’t want to tug on your beard.

You can also use a beard comb to distribute the oil evenly.

Leave the oil in for at least 30 minutes before styling your beard as usual.

For best results, use your beard oil daily, ideally after washing your beard.

Top Natural Beard Oil Brands

You’ve mastered the art of using beard oil effectively, now it’s time to explore the best natural beard oil brands that’ll take your grooming game to the next level.

You’ll want to check out Ursa Major, a brand that offers a wide range of natural beard oils with unique blends of essential oils.

Their products are free from harsh chemicals and artificial fragrances, making them perfect for sensitive skin.

Another top contender is Portland Beard Company, which uses only the finest natural ingredients to create their beard oils.

Their products are handcrafted in small batches, ensuring each bottle is filled with love and care.

If you’re looking for a brand that’s eco-friendly and sustainable, look no further than The Bearded Chap.

They use recyclable packaging and source their ingredients from environmentally responsible suppliers.

Lastly, don’t miss out on Bluebeards Original, a brand that’s been around since 2005 and has perfected the art of creating natural beard oils that promote healthy beard growth and softness.

Conclusion

You’ve got the basics down, now it’s time to elevate your beard game! By incorporating essential natural beard oil into your daily routine, you’ll be sporting a healthy, shiny beard in no time. Remember to choose a oil with simple, natural ingredients, apply it correctly, and don’t be afraid to experiment with different scents. With a little patience and practice, you’ll be rocking a vibrant, well-groomed beard that’s sure to turn heads.

Weddings, Parties, and Corporate Events – Why a Photo Booth is a Must-Have in West Palm Beach

Weddings, Parties, and Corporate Events – Why a Photo Booth is a Must-Have in West Palm Beach

Planning an event in West Palm Beach, Florida? Whether you're hosting a wedding, birthday party, corporate event, or community gathering, a photo booth rental can take your celebration to the next level. Not only does it provide entertainment, but it also creates lasting memories for you and your guests.

Why Rent a Photo Booth for Your Event?

A photo booth is more than just a fun activity—it enhances the guest experience and provides instant keepsakes. Here’s why you should consider adding one to your event:
 

  • Interactive Entertainment – Guests of all ages enjoy posing with props and capturing fun moments.
  • Instant Photo Keepsakes – High-quality prints serve as personalized souvenirs for attendees.
  • Social Media Integration – Many booths offer instant sharing options for Facebook, Instagram, and more.
  • Custom Branding – Perfect for corporate events, allowing businesses to display logos and messages on prints.
  • Event Theme Enhancement – Choose custom backdrops, props, and filters to match your event’s aesthetic.

Types of Photo Booths Available in West Palm Beach

When looking for the right photo booth rental in West Palm Beach, consider the various styles available to suit your event:
 

  • 360 Photo Booth – Captures dynamic, slow-motion videos for a high-energy experience.
  • Mirror Photo Booth – A touch-screen, interactive mirror that provides a unique selfie station.
  • Open-Air Photo Booth – A modern setup ideal for larger groups and a sleek look.
  • Enclosed Photo Booth – A traditional booth offering a private and nostalgic photo experience.
  • GIF & Boomerang Booths – Creates animated images perfect for social media sharing.

Best Occasions for a Photo Booth Rental in West Palm Beach

Photo booths are a great addition to various events, including:
 

  • Weddings – Guests can take home custom photo strips featuring the couple’s names and wedding date.
  • Birthday Parties – Celebrate milestones with themed props and fun backdrops.
  • Corporate Events – Increase brand awareness with customized photo prints featuring company logos.
  • Graduations – Capture the excitement of academic achievements with friends and family.
  • Bridal and Baby Showers – Add a personalized touch to pre-wedding and baby celebrations.
  • Community Festivals and Charity Events – Entertain attendees while promoting your cause or organization.

How Much Does It Cost to Rent a Photo Booth in West Palm Beach?

Pricing for a photo booth rental West Palm Beach rental depends on the type of booth, duration, and additional features. On average:
 

  • Basic Photo Booth Packages start at $250 to $400 for a few hours.
  • Premium Photo Booths like 360 or mirror booths range from $500 to $1,000 or more.
  • Customization and Add-Ons such as branded templates, digital sharing, and green screens may have extra costs.

Choosing the Right Photo Booth Rental Company in West Palm Beach

To ensure a seamless experience, look for a trusted photo booth rental provider that offers:
 

  • High-resolution cameras and professional lighting
  • Customizable prints, digital sharing, and special effects
  • Attendants for on-site assistance
  • Hassle-free setup and breakdown
  • Positive customer reviews and testimonials

Final Thoughts

A photo booth rental in West Palm Beach is an excellent way to add excitement and capture unforgettable memories at your event. With customizable features, fun props, and modern technology, it’s a crowd-pleasing addition that your guests will love.

Start planning today and book your West Palm Beach photo booth rental to create a fun and engaging experience for your guests!