Bouncy Castle Competitions  Test Your Skills!

Bouncy Castle Competitions Test Your Skills!

Have you ever considered the unique challenge that bouncy castle competitions present? These events aren’t just for kids; they require a surprising amount of skill, agility, and strategy. You might think bouncing around is all fun and games, but the various challenges—from obstacle courses to bounce and shoot contests—demand serious athleticism. If you’re curious about what it takes to excel in this vibrant arena and how you can get involved, there’s much more to uncover about the skills and techniques that can set you apart from the competition.

Overview of Bouncy Castle Competitions

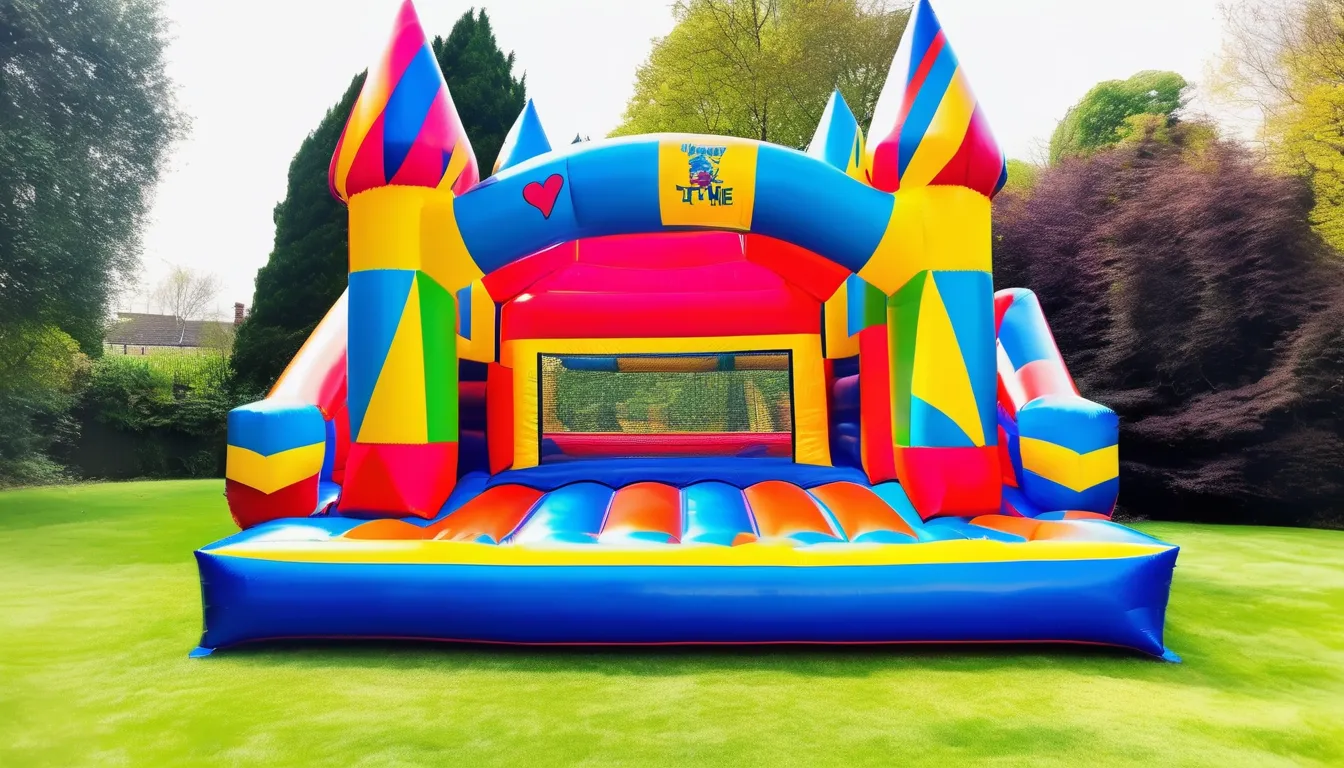
Bouncy Castle Competitions, while seemingly whimsical, offer a thrilling blend of fun and athleticism that captivates participants of all ages. You’ll find these events often held at fairs, festivals, and community gatherings, where everyone can join in on the excitement. Each competition is designed to challenge your agility, balance, and coordination.

As you step onto the inflatable arena, the vibrant colors and lively atmosphere instantly lift your spirits. You’ll bounce your way through various obstacles, challenging not only your physical abilities but also your strategic thinking. These competitions can get your adrenaline pumping, pushing you to outperform your peers while enjoying the lighthearted spirit of the event.

Participants of all skill levels can join in, making it a perfect way to bond with friends and family. The laughter and cheers echo around you, creating a sense of camaraderie that enhances the experience.

Whether you’re a seasoned pro or a first-timer, you’ll discover that bouncy castle competitions provide not just fun, but also a unique opportunity to test your limits in an exhilarating and supportive environment.

Types of Challenges Available

When you enter a bouncy castle competition, you’re greeted by a variety of exciting challenges designed to test your skills and keep the adrenaline flowing.

One popular challenge is the obstacle course, where you navigate through inflatable hurdles, slides, and tunnels, racing against the clock or your fellow competitors. It’s all about speed and agility as you bounce your way to victory.

Another thrilling option is the bounce and shoot challenge, where you combine your jumping skills with aim. You’ll need to launch balls at targets while maintaining your balance on the bouncy surface. It’s a fun twist that demands focus and coordination.

If you’re feeling competitive, try the team relay challenge. Teams compete in a series of relays, passing a baton while bouncing through designated zones.

This challenge emphasizes teamwork and communication, making it a great way to bond with friends.

Skills Required to Compete

To excel in bouncy castle competitions, you’ll need a mix of agility, balance, and coordination. These skills are crucial as you navigate through various challenges while bouncing around. Agility allows you to change direction quickly, helping you avoid obstacles or competitors. You’ll find that being nimble can be a game-changer in tight situations.

Balance is equally important. You’ll need to maintain your stability while jumping, spinning, or landing on uneven surfaces. A strong sense of balance prevents falls and keeps you in the game longer. Practicing on balance beams or trampolines can sharpen this skill.

Coordination ties everything together. You’ll have to synchronize your movements to execute jumps and turns effectively. This involves timing your actions with the rhythm of your bounce. Engaging in activities like dance or martial arts can enhance your coordination, making you a more formidable competitor.

Lastly, physical fitness plays a role too. Building your endurance will help you sustain energy throughout the competition. Incorporating cardio workouts into your routine will boost your stamina and keep you bouncing strong.

Embrace these skills, and you’ll be well-prepared for the exciting world of bounce house rental castle competitions!

Tips for Success

Mastering the skills of agility, balance, and coordination sets a strong foundation for success in bouncy castle competitions. To enhance your performance, follow these tips:

  1. Practice Regularly: The more you bounce, the better you’ll get. Incorporate drills that focus on jumping, landing, and quick direction changes.
  2. Stay Fit: Maintain your overall fitness through strength training and cardio. A strong core and legs will improve your stability and power.
  3. Learn from Others: Watch experienced competitors. Observe their techniques and strategies, then apply what you learn in your practice.
  4. Keep Your Cool: Mental preparation is just as important as physical training. Stay calm and focused during competitions to maximize your performance.
  5. Hydrate and Fuel Up: Proper nutrition and hydration can make a big difference. Eat a balanced diet and drink plenty of water before competing.

Here’s a quick reference table to summarize these tips:

Tip Description
Practice Regularly Enhance skills through consistent practice
Stay Fit Improve overall fitness and stability
Learn from Others Observe and adapt successful techniques
Keep Your Cool Maintain focus and composure
Hydrate and Fuel Up Prioritize nutrition and hydration

How to Join an Event

Joining a bouncy castle competition can be an exciting experience, and it’s easier than you might think. First, check local event listings or online forums to find competitions in your area. Many organizers promote events on social media, so follow bouncy castle groups to stay updated.

Once you find an event that catches your interest, you’ll want to register. Most competitions have online registration forms, which often require basic information like your name, age, and contact details. Be sure to read the rules and regulations before signing up; each competition might’ve specific requirements, such as age categories or skill levels.

After registering, prepare for the event. Practice your bouncing skills and familiarize yourself with different bouncy castle designs. It’s also smart to connect with fellow competitors for tips and camaraderie.

On the day of the event, arrive early to warm up and soak in the atmosphere. Don’t forget to bring any necessary gear, like comfortable clothing and water.

With a little preparation and enthusiasm, you’ll be ready to join the fun and showcase your skills at the bouncy castle competition!

Conclusion

Bouncy castle competitions are a fantastic way to have fun while testing your skills! Whether you’re racing through obstacle courses or showing off your bounce and shoot abilities, there’s something for everyone. By honing your agility, balance, and coordination, you’ll not only improve your performance but also create lasting memories with friends and family. So, gather your crew, join an event, and dive into the excitement—who knows, you might just be the next champion!

Maximizing Your EB1 Application Tips for a Successful Case

When you’re looking to maximize your EB1 application, a strategic approach is essential. You’ll want to start by thoroughly understanding the eligibility criteria that apply to your specific situation. Organizing your documentation is critical; you’ll need to gather everything from academic records to compelling letters of recommendation. It’s not just about what you’ve done, but how you present it. As you consider these elements, think about how you can make your case stand out in a competitive landscape. What’s the next step in crafting a compelling narrative that showcases your unique contributions?

Understand EB1 Eligibility Criteria

To successfully navigate the EB1 application process, you need to understand the eligibility criteria thoroughly. The EB1 visa is designed for individuals with extraordinary abilities in their field, outstanding professors or researchers, and multinational managers or executives.

First, evaluate if you fall into one of these categories.

For extraordinary ability, you must demonstrate sustained national or international acclaim. This could involve showing awards, publications, or membership in organizations that require outstanding achievements. You should also be able to prove that you intend to continue working in your area of expertise in the U.S.

If you’re an outstanding professor or researcher, you need to have at least three years of experience in teaching or research, along with a significant record of publications and contributions to your field. Your work should be recognized as having a substantial impact.

For multinational managers or executives, you must have been employed in a managerial or executive capacity for at least one year within the past three years by a qualifying organization.

Understanding these specific requirements is crucial because meeting them lays the groundwork for a successful EB1 application.

Gather Essential Documentation

Gathering essential documentation is a critical step in strengthening your EB1 application. You’ll want to compile a comprehensive collection of evidence that showcases your qualifications and achievements.

Start by collecting your academic records, including diplomas, transcripts, and certificates. This helps demonstrate your educational background and expertise in your field.

Next, gather letters of recommendation from reputable individuals in your industry. These letters should highlight your contributions and how they’ve impacted your field.

Be sure to include publications, presentations, or patents that you’ve authored or co-authored. This documentation will illustrate your influence and recognition within your profession.

Don’t forget to include any awards or honors you’ve received, as these validate your exceptional abilities.

Additionally, if you’ve played a significant role in any projects or initiatives, provide documentation that outlines your contributions and the outcomes.

Highlight Your Achievements

When it comes to your EB1 application, highlighting your achievements is essential for demonstrating your exceptional ability. You need to showcase your contributions to your field, making them clear and impactful. Consider what sets you apart from others and how your work has made a difference.

Here’s a simple table to help you organize your achievements:

Achievement Date Impact
Published Research Paper January 2020 Advanced understanding in XYZ
Awarded Industry Honor March 2021 Recognized for excellence in ABC
Keynote Speaker July 2022 Influenced 500+ professionals
Successful Project Lead September 2023 Increased company revenue by 30%

Obtain Strong Recommendation Letters

Strong recommendation letters can significantly bolster your EB1 application, showcasing your accomplishments from the perspective of respected professionals in your field.

These letters provide a compelling narrative about your contributions and the impact of your work. To secure strong letters, follow these three key steps:

  1. Choose the Right Recommenders: Select individuals who are highly regarded in your industry and have firsthand knowledge of your work. This could include immigration lawyer for eb1 case mer supervisors, collaborators, or leaders in your field.
  2. Provide Clear Guidelines: When asking for a letter, share specific achievements and projects you’d like them to highlight. This ensures they cover the most relevant aspects of your career and helps them write a more targeted letter.
  3. Follow Up and Express Gratitude: After sending your request, follow up politely to confirm they’re willing to write the letter.

Once they submit it, remember to thank them for their support. Acknowledging their effort strengthens your professional relationships.

Prepare for a Comprehensive Interview

Securing strong recommendation letters is just one part of the EB1 application process; preparing for a comprehensive interview is equally important. This interview can make or break your application, so you need to approach it with the right mindset and preparation.

Start by reviewing your entire application thoroughly. Be familiar with every detail, including your achievements, contributions, and the specifics of your field. Understand how your work aligns with the EB1 criteria, as you’ll need to articulate this clearly during the interview.

Practice answering common interview questions related to your qualifications and contributions. You might be asked to explain why you’re a leader in your field or how your work has benefited others. Rehearse your answers to ensure you convey confidence and clarity.

Also, prepare to discuss your recommendation letters. Know who wrote them and what key points they highlighted about your work.

Conclusion

In conclusion, maximizing your EB1 application takes careful planning and attention to detail. By understanding the eligibility criteria and gathering the right documentation, you’ll set a strong foundation. Highlighting your achievements and securing compelling recommendation letters will further strengthen your case. Finally, prepare for your interview with confidence, ensuring you can articulate your qualifications clearly. With these strategies in place, you’ll boost your chances of a successful EB1 application. Good luck!

Portable Sink Rentals  Complete Your Restroom Solution

Portable Sink Rentals Complete Your Restroom Solution

When planning an event or managing a project, you know that hygiene is crucial, and portable sink rentals can be a key component in your restroom solution. These sinks provide easy access to handwashing, which is essential for maintaining health standards. With various options available, including ADA-compliant models, you can find something that meets your specific needs. But how do you choose the right rental company to ensure everything goes smoothly? Understanding what to look for can make all the difference in your setup.

Importance of Hand Hygiene

Hand hygiene is crucial in preventing the spread of germs and illnesses, especially in communal settings. You mightn’t realize how often you touch your face or surfaces that harbor bacteria. By practicing proper hand hygiene, you drastically reduce the risk of infection for yourself and those around you.

Washing your hands with soap and water for at least 20 seconds can effectively remove harmful pathogens. When soap isn’t available, using hand sanitizer with at least 60% alcohol is a good alternative.

Remember, it’s not just about washing after using the restroom; you should also cleanse your hands before eating, after coughing or sneezing, and after touching shared surfaces.

In environments like schools, offices, and events, encouraging everyone to maintain hand hygiene is essential. You can lead by example, promoting a culture where handwashing becomes a routine habit.

Benefits of Portable Sink Rentals

Having access to proper handwashing facilities can significantly enhance hygiene practices in any setting.

Portable sink rentals offer you a practical solution that meets various needs, whether for events, construction sites, or temporary setups.

Here are some key benefits:

  1. Convenience: You can place portable sinks wherever you need them, ensuring handwashing stations are easily accessible to everyone.
  2. Improved Hygiene: With dedicated handwashing facilities, you’ll promote better hygiene practices among attendees or workers, reducing the spread of germs.
  3. Cost-Effective: Renting portable sinks eliminates the need for permanent installations, saving you money on plumbing and maintenance costs.
  4. Flexibility: These sinks can be rented for short or long-term use, allowing you to adjust based on your specific event or project requirements.

Types of Portable Sinks

When selecting a portable sink, you’ll find a variety of options tailored to different needs and settings. Whether you need a sink for an outdoor event, a food truck, or a construction site, there’s a model designed just for that purpose.

Here’s a quick overview of some common types of portable sinks:

Type Features Ideal Use
Handwashing Sink Compact, easy to transport, often has foot-pump or sensor activation Events, festivals, and gatherings
Multi-Compartment Sink Larger, includes multiple basins for washing, rinsing, and sanitizing Food service, catering, and food trucks
ADA-Compliant Sink Designed for accessibility, with lower height and easy access Hospitals, schools, and public events

Each type serves a unique function, ensuring you can meet health and sanitation requirements wherever you go. By understanding your specific needs, you can select the right portable sink that not only enhances convenience but also promotes cleanliness and hygiene in any situation.

Choosing the Right Rental Company

Selecting the right rental company for portable sinks can make all the difference in your event’s success. With so many options available, it’s crucial to choose a company that meets your specific needs.

Here are four key factors to consider:

  1. Reputation: Look for companies with positive reviews and testimonials. A strong reputation indicates reliability and customer satisfaction.
  2. Variety of Options: Ensure the company offers a range of sink styles and sizes. Having different options allows you to select what best suits your event.
  3. Pricing Transparency: Choose a company that provides clear pricing with no hidden fees. Understanding the costs upfront helps you stay within budget.
  4. Customer Support: Good communication is vital. Opt for a rental company that responds promptly to your inquiries and provides support throughout the rental process.

Tips for Effective Setup and Use

To ensure your portable sink setup is smooth and efficient, start by choosing an appropriate location that’s easily accessible for guests and staff.

Look for a flat, stable surface to avoid any tipping hazards. If you’re outdoors, consider shade to keep the water at a comfortable temperature.

Next, connect the sink to a water source. Make sure you have the necessary hoses and fittings, and check for leaks before guests arrive.

Once the sink’s operational, familiarize yourself with its features, like the soap dispenser and hand-drying options, so you can assist users if needed.

Keep the area around the sink clean and clutter-free. Place signs nearby to guide users and remind them of proper handwashing techniques.

Regularly check the water levels and soap supply throughout the event. If you notice any issues, address them immediately to maintain a positive experience for everyone.

Conclusion

Incorporating portable sink rentals into your event or project is a smart move temporary chain link fencing enhancing hand hygiene and ensuring a safe environment. With various options available, you can easily find the right sink to meet your needs. By choosing a reliable rental company and following setup tips, you’ll provide guests with accessible handwashing facilities. Don’t underestimate the impact of these sinks—investing in them not only promotes better hygiene practices but also leaves a positive impression on your attendees.

Templates for Beer Labels  Easy Solutions for Unique Designs

Templates for Beer Labels Easy Solutions for Unique Designs

When you’re looking to create a standout beer label, templates can be your best friend. They offer a streamlined approach that saves you time while giving you the flexibility to customize designs that reflect your brand’s identity. By selecting the right template, you can ensure that your label not only attracts attention but also resonates with your target audience. As you explore various resources for finding these templates, you might discover some surprising tips that could elevate your design game. Curious about how to make your labels truly memorable?

Benefits of Using Templates

When you choose to use beer label templates, you’re not just saving time; you’re boosting your creativity and ensuring consistency. By opting for these templates, you eliminate the daunting task of starting from scratch. Instead, you can focus on customizing elements to reflect your brand’s personality. This flexibility allows you to experiment with colors, fonts, and images that resonate with your target audience.

Moreover, using templates guarantees a professional appearance. You won’t have to worry about mismatched designs or unintentional errors that could undermine your brand’s reputation. Templates come with pre-set dimensions and layouts, making it easier to create labels that fit perfectly on your bottles or cans.

Another significant benefit is the ease of collaboration. If you’re working with a team, templates provide a unified framework for everyone to follow, ensuring that your final product aligns with your vision.

Plus, you can easily modify the templates for seasonal releases or special events, keeping your branding fresh and relevant.

In essence, beer label templates are a powerful tool that streamlines the design process while enhancing your brand’s creativity and consistency. You’ll find that the right template can make a world of difference in your brewing adventures.

Choosing the Right Template

Selecting the right beer label template can significantly impact your brand’s identity and appeal. The perfect template not only reflects your brewing style but also resonates with your target audience.

To ensure you make the best choice, consider these three important factors:

  1. Design Compatibility: Think about your brand’s overall aesthetic. A template should complement your logo and color scheme. Whether your style is vintage, modern, or quirky, choose a design that enhances your story.
  2. Label Size and Shape: Different bottle sizes and styles require specific label dimensions. Make sure the template you choose fits your packaging perfectly. A well-fitted label not only looks professional but also ensures all necessary information is prominently displayed.
  3. Print Quality: Look for templates designed for high-quality printing. Some templates may look great on-screen but can suffer when printed. Ensure your chosen template accommodates the necessary resolution and materials for stunning results.

Customization Tips for Labels

Customizing your beer labels is a crucial step in creating a memorable brand presence. To make your labels stand out, consider incorporating unique elements that reflect your brewery’s personality. Here are some tips to guide you:

  1. Color Scheme: Choose colors that align with your brand identity. Bright colors can attract attention, while earthy tones can evoke a sense of tradition.
  2. Typography: Select fonts that are easy to read but also convey your brand’s character. Mixing fonts can add visual interest but keep it limited to avoid clutter.
  3. Imagery: Use high-quality images or illustrations that represent your beer’s flavor profile. Ensure they’re relevant and appealing.
  4. Information Layout: Organize information clearly. Highlight key details like the beer name, style, and ABV prominently.

Here’s a simple table to help you keep track of your customization ideas:

Customization Element Tips
Color Scheme Align with brand identity
Typography Use readable, unique fonts
Imagery High-quality, relevant art
Information Layout Clear and organized display

Implementing these strategies will enhance your label’s impact and attract more customers!

Popular Design Styles

As you explore popular design styles for your beer labels, you’ll find that each approach can evoke different emotions and attract various audiences. Choosing the right style can make your brand memorable and draw in customers.

Here are three popular design styles to consider:

1. Vintage: This style taps into nostalgia, using classic typography and aged textures. It often features muted colors and illustrations reminiscent of old breweries, giving your label a timeless appeal.

2. Minimalist: If you prefer a clean and modern look, minimalist designs focus on simplicity and elegance. Bold typography and ample white space create a striking contrast, allowing your brand name to take center stage.

This style appeals to a contemporary audience.

3. Illustrative: This style allows you to showcase creativity through detailed artwork or fun illustrations. Whether it’s whimsical characters or intricate designs, illustrative labels can tell a story, making your beer memorable and engaging.

Resources for Template Access

To create stunning beer labels that reflect your brand’s identity, you’ll want to access quality templates that streamline the design process. Fortunately, there are numerous resources available to help you find the perfect templates.

Start by exploring design platforms like Canva, Adobe Spark, and Vistaprint, which offer a variety of customizable beer label templates. These platforms are user-friendly and provide a wide array of styles to match your brand aesthetic.

Another great option is Etsy, where independent designers sell unique templates. By purchasing a template, you not only get a professional design but also support small businesses.

If you’re looking for free options, websites like Freepik and Creative Market often feature free templates that you can modify to suit your needs. Just make sure to check the licensing agreements to ensure you’re using them correctly.

Lastly, consider joining online communities or create your own beer can labels ums dedicated to home brewing or craft beer. Members often share their design resources, which can lead you to hidden gems.

Conclusion

Using templates for your beer labels can save you time and boost your creativity. By choosing the right template, you can easily craft a design that reflects your brewing style and captures your audience’s attention. With a few customization tips and an understanding of popular design styles, you’ll create memorable labels that stand out on the shelves. So, dive into the resources available, and start designing a label that truly represents your unique brew!

Understanding Meat Slicer Parts  What to Look For

Understanding Meat Slicer Parts What to Look For

When you’re considering a meat slicer, it’s crucial to understand the various parts that contribute to its performance. You’ll want to examine the blade quality closely, as a high-quality stainless steel blade can make all the difference in achieving precise cuts. Motor power is another key factor; it determines how well the slicer can handle different types of meat. But that’s just the beginning—there are also important safety features and maintenance tips you shouldn’t overlook. Let’s explore what you need to know to make an informed choice.

Importance of Blade Quality

When it comes to meat slicers, the blade quality is crucial for achieving precise cuts and maintaining food safety. A high-quality blade ensures that your slices are uniform, whether you’re working with deli meats, cheeses, or vegetables.

You’ll notice that a sharper blade not only makes cleaner cuts but also reduces the risk of cross-contamination. Dull blades can tear food rather than slice it, leading to uneven pieces that can harbor bacteria.

The material of the blade matters too. Stainless steel is often the best choice due to its resistance to rust and corrosion, ensuring durability over time.

You’ll want to look for blades with a high Rockwell hardness rating, as these tend to stay sharp longer and require less frequent sharpening.

Regular maintenance is essential for preserving blade quality. Keep your blades clean and check for any nicks or dull spots; this will help you maintain optimal performance.

If your blade isn’t up to standard, it might be time to replace it. Remember, investing in a quality blade isn’t just about efficiency; it’s about ensuring the safety and quality of your food.

Types of Feed Trays

Feed trays are essential components of meat slicers that directly affect efficiency and ease of use.

When selecting a meat slicer, you’ll find various types of feed trays designed to meet different slicing needs. Understanding these options helps you choose the right one for your kitchen.

  • Standard Feed Tray: This is the most common type, suitable for a wide range of meats and cheeses. It offers a flat surface for easy placement and adjustment of food items.
  • Adjustable Feed Tray: If you need versatility, consider an adjustable feed tray. You can change its height or angle, allowing for more control when slicing different food types.
  • Gravity Feed Tray: This type uses gravity to assist in feeding food into the blade, ideal for high-volume slicing. It ensures a steady flow of products, making it perfect for busy environments.

Understanding the Motor Power

Understanding the motor power of your meat slicer is crucial, as it directly impacts performance and efficiency. When you’re choosing a slicer, pay attention to the motor’s wattage. A higher wattage usually means more power, allowing you to slice through tougher meats and larger quantities with ease.

Generally, motors range from 100 to 1,200 watts. For home use, a motor around 300-500 watts should suffice, while commercial models often need at least 1,000 watts to handle heavy workloads.

Additionally, consider the motor type. A direct-drive motor connects directly to the blade, providing consistent power and speed. This type is often more reliable and requires less maintenance.

On the other hand, a belt-driven motor can offer quieter operation but may require more upkeep over time.

You should also look at the slicer’s RPM (revolutions per minute). A higher RPM means faster slicing, which can save you time during meal prep. However, balance this with the need for precision cuts, as very high speeds can lead to uneven slices.

Ultimately, understanding these motor aspects will help you select the right meat slicer for your needs.

Safety Features to Consider

A few essential safety features can make a significant difference in your meat slicing experience.

When you’re handling sharp blades and heavy machinery, it’s crucial to prioritize your safety.

Here are some features you should look for:

  • Blade Guard: This protects your hands from the sharp edges while the slicer is in use. A good blade guard will keep accidental contact to a minimum.
  • Safety Switch: A reliable safety switch ensures the machine won’t operate unless it’s intentionally activated. This feature can prevent accidental starts, especially in busy kitchens.
  • Non-Slip Feet: Stability is key when slicing. Non-slip feet help keep the slicer anchored to your countertop, reducing the risk of slips and accidents during operation.

Maintenance and Cleaning Tips

Proper maintenance and cleaning are vital for keeping your meat slicer in top-notch condition. Start by unplugging the machine before you begin any cleaning or maintenance tasks.

Remove the blade guard and wash it with warm, soapy water. For the blade itself, use a damp cloth to wipe it down, being careful of the sharp edges. Some slicers have removable blades, which you should take off for a thorough clean. Always follow the manufacturer’s instructions hobart meat grinder parts this process.

Next, clean the food carriage, guides, and any other parts that come into direct contact with food. Use a mild detergent and rinse thoroughly. After cleaning, dry all components completely to prevent rust or contamination.

Regularly inspect the slicer for signs of wear or damage. Pay special attention to the blade, as dull blades can affect performance and safety. If the blade shows signs of dullness, sharpen it or replace it as needed.

Conclusion

In conclusion, when choosing a meat slicer, focus on blade quality, motor power, feed tray type, and safety features. A high-quality stainless steel blade ensures clean cuts, while a powerful motor can handle tougher meats. Whether you opt for a standard or adjustable feed tray impacts your slicing efficiency. Don’t forget to prioritize safety with features like blade guards and non-slip feet. By considering these factors, you’ll find the perfect slicer for your needs.