
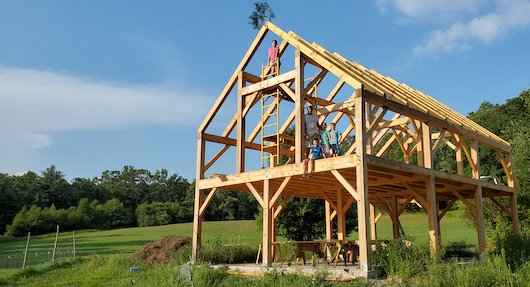
Hidden Costs to Consider When Buying a Timber Frame Kit
When you're considering a timber frame kit, you're likely focusing on the upfront cost of the materials and construction. But, you're not thinking about the other expenses that can quickly add up – the ones that can turn your dream home into a financial nightmare. You'll need to factor in site preparation, foundation costs, and electrical and plumbing expenses, not to mention permits and professional fees. These hidden costs can blow your budget if you're not prepared. So, what are these expenses, and how can you avoid surprise costs down the line?
Site Preparation and Clearance
As you prepare to break ground on your timber frame project, site preparation and clearance take center stage.
You'll need to ensure the land is clear of debris, trees, and other obstacles that could hinder construction. This process can be time-consuming and labor-intensive, but it's essential to get it right.
You'll need to consider hiring professionals to clear the land, especially if you're dealing with dense foliage or hazardous materials.
This can add to your overall costs, but it's better to be safe than sorry. You'll also need to factor in the cost of removing any existing structures, such as old buildings or septic systems.
Additionally, you'll need to prepare the site for construction by grading the land and ensuring it's level.
This may involve bringing in heavy machinery, which can further increase costs. It's crucial to budget for these expenses upfront to avoid surprise costs down the line.
Foundation and Base Costs
Laying the groundwork for your timber frame project means turning your attention to foundation and base costs, a critical component of the overall construction process.
You'll need to consider the type of foundation your kit requires, as well as the site-specific conditions that'll impact your foundation costs. For example, if your building site has poor soil or a high water table, you may need to invest in specialized foundation systems or additional site work.
You'll also need to factor in the cost of the base itself, which can include materials like concrete, insulation, and waterproofing membranes.
Additionally, you may need to hire a professional to design and install the foundation, which can add to your overall costs.
Be sure to research local building codes and regulations, as these can also impact your foundation and base costs.
Electrical and Plumbing Expenses
With your foundation and base in place, you'll need to bring your timber frame kit to life with electrical and plumbing systems.
These essential components will add functionality and comfort to your new space. However, they come with significant expenses that you shouldn't overlook.
When it comes to electrical systems, you'll need to factor in the cost of hiring a licensed electrician to design and install the electrical wiring, outlets, and lighting fixtures.
This can cost anywhere from $3 to $10 per square foot, depending on the complexity of the system and the location of your project.
Plumbing expenses are equally important to consider.
You'll need to install pipes, fixtures, and appliances, such as sinks, toilets, and water heaters.
The cost of plumbing can range from $5 to $20 per square foot, depending on the type of fixtures and appliances you choose.
Don't forget to also budget for any necessary permits and inspections to ensure your electrical and plumbing systems meet local building codes.
Insulation and Dry Lining Costs
Your timber frame kit's walls, floor, and ceiling need insulation to regulate the internal temperature and reduce energy costs.
This is a crucial aspect of your project, as it will impact your home's overall comfort and energy efficiency. You'll need to consider the type and quality of insulation you'll use, as well as the cost of materials and labor.
Insulation costs can vary depending on the type you choose. Fiberglass batts are a budget-friendly option, while spray foam insulation is more expensive but provides better performance.
You'll also need to factor in the cost of dry lining, which involves installing a secondary layer of insulation and a vapor barrier to prevent moisture damage. Don't forget to include the cost of labor, as installing insulation and dry lining can be a time-consuming process.
When budgeting for insulation and dry lining, be sure to research local building codes and regulations. You may need to meet specific energy efficiency standards, which could impact your insulation choices and costs.
Finishing Touches and Extras
Once you've tackled the insulation and dry lining, it's time to focus on the finishing touches that'll turn your timber frame kit into a cozy home.
These extras can add up quickly, so it's essential to factor them into your budget. You'll need to consider flooring, which can range from affordable options like laminate to high-end hardwood.
Don't forget about lighting fixtures, plumbing fixtures, and kitchen and bathroom fittings – these may seem like minor expenses, but they can quickly add up.
Additionally, you may want to consider upgrading to high-end finishes like granite countertops or custom cabinetry. These extras can make a significant difference in the overall look and feel of your home, but they come at a cost.
Be sure to also budget for any necessary permits or inspections, as well as the cost of hiring professionals to install these finishing touches. By factoring these expenses into your budget, you can ensure that your timber frame kit becomes the home of your dreams without breaking the bank.
Conclusion
You've finally found the perfect timber frame house kits kit, but don't forget to factor in the hidden costs that can quickly add up. From site preparation to finishing touches, these expenses can make or break your budget. By considering these often-overlooked costs upfront, you'll avoid surprise expenses and ensure your dream home becomes a reality within budget. So, take a closer look at your finances and plan accordingly to turn your timber frame kit into a stunning, completed home.