

Terp Slurpers A New Era in Concentrate Consumption
As you consider upgrading your concentrate consumption experience, you might be wondering what sets the latest devices apart from traditional methods. Terp slurpers have been gaining attention for their innovative approach to vaporizing concentrates, promising a cleaner and more efficient experience. But what exactly makes them so effective, and how do they compare to the techniques you’re used to? By exploring the design and functionality of terp slurpers, you’ll discover the benefits they offer – and whether they’re worth making the switch. The question is, are you ready to experience concentrates in a whole new way?
What Are Terp Slurpers
Think of a bong, but instead of water, you’re using a different medium to cool and filter the smoke. That’s basically what a terp slurper is – a device that’s designed to enhance your concentrate consumption experience.
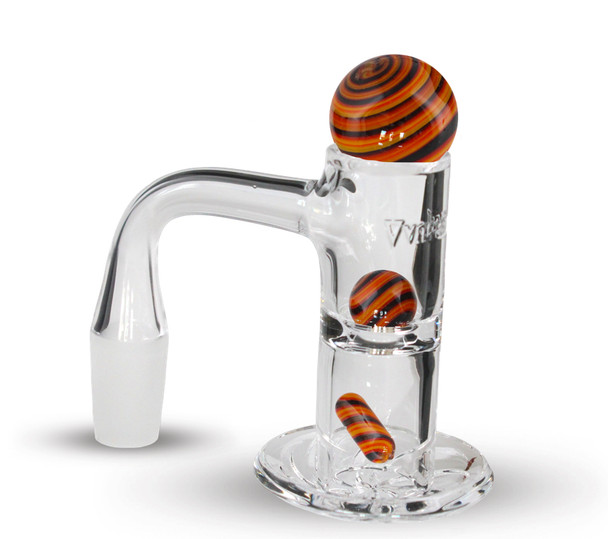
Terp slurpers are typically made from glass or ceramic and come in different shapes and sizes. They’re designed to efficiently vaporize your concentrates while preserving the delicate terpene flavors.
When you use a terp slurper, you’re able to enjoy a smoother, more flavorful hit compared to traditional methods like dabbing. The device allows you to control the airflow, which helps to regulate the temperature and prevent overheating.
This results in a more enjoyable experience with less waste and a more efficient use of your concentrates. Terp slurpers are becoming increasingly popular among concentrate enthusiasts, and it’s easy to see why.
They offer a unique combination of flavor, efficiency, and control that’s hard to find with other devices. As you explore the world of terp slurpers, you’ll likely find that they’re an essential tool for any serious concentrate connoisseur.
How terp slurper Work
Using a terp slurper, you’ll notice it operates on a relatively simple principle: as you inhale, air is drawn through a filtered path to cool and vaporize your concentrates.
The concentrate is placed on a heating element, typically a metal coil, and the filtered air is pulled through it. As the air makes contact with the heated concentrate, it vaporizes, releasing the desired compounds.
The design of a terp slurper plays a crucial role in its effectiveness. The filtered path helps to remove impurities, while the heating element ensures an even temperature distribution. This results in a smoother, more flavorful experience.
- You’ll be able to taste the unique terpene profiles in your concentrates like never before.
- The cooling effect of the filtered air will reduce discomfort and irritation.
- The precise temperature control will allow you to customize your experience.
- You’ll be able to enjoy your concentrates without the harshness often associated with other consumption methods.
Benefits of Using Terp Slurpers
When you’re in the market for a premium concentrate experience, terp slurpers offer numerous benefits. Terp slurpers enhance your concentrate experience by maximizing the effectiveness of terpenes and cannabinoids. They work by creating a vacuum to extract every last bit of concentrate, ensuring minimal waste.
Here are some key benefits of using terp slurpers:
| Benefits | Description |
|---|---|
| Efficient Extraction | Terp slurpers minimize waste by extracting every last bit of concentrate. |
| Flavor Preservation | They help preserve the delicate flavors and aromas of terpenes, resulting in a more enjoyable experience. |
| Increased Potency | By efficiently extracting cannabinoids, terp slurpers provide a more potent experience. |
| Easy to Clean | Terp slurpers are designed for easy cleaning, making maintenance a breeze. |
With terp slurpers, you can enjoy your concentrates without worrying about wasting valuable product. Their efficient extraction and flavor preservation capabilities make them an attractive option for those looking to elevate their concentrate experience.
Terp Slurpers Vs Traditional Methods
You’ve likely tried traditional methods for consuming concentrates, but how do they stack up against terp slurpers?
Traditional methods, such as dab rigs and concentrate pens, can be messy and wasteful.
You may find yourself dealing with sticky residue, clogged devices, and a diminished flavor profile.
In contrast, terp slurpers offer a cleaner and more efficient way to enjoy your favorite concentrates.
Here are a few key differences that set terp slurpers apart from traditional methods:
- *Less waste and mess*: Terp slurpers are designed to capture every last bit of concentrate, minimizing waste and cleanup.
- *Better flavor profile*: Terp slurpers allow for a more nuanced and intense flavor experience, thanks to their unique design and material.
- *Increased efficiency*: Terp slurpers heat more evenly and consistently, ensuring a smoother and more enjoyable experience.
- *Easier to use*: Terp slurpers are often simpler to operate than traditional methods, with fewer moving parts and less complexity.
Future of Concentrate Consumption
Terp slurpers are revolutionizing the way you consume concentrates, and this shift is just the beginning. As technology continues to evolve, you can expect even more innovative products to emerge, further changing the concentrate landscape.
One potential development is the integration of terp slurpers with other cannabis products, such as vaporizers or dab rigs. This could create a more streamlined and efficient consumption experience.
Another trend you might see in the future is the growth of portable terp slurpers. These devices would allow you to enjoy concentrates on-the-go, making it even more convenient to use them whenever you want.
Additionally, advancements in materials and design could lead to more durable and easy-to-clean terp slurpers, reducing waste and making them even more appealing to consumers.
As the industry continues to innovate, you can expect terp slurpers to play a major role in shaping the future of concentrate consumption. With their unique ability to deliver intense flavor and potency, it’s likely that terp slurpers will become an essential tool for cannabis enthusiasts.
Conclusion
You’re on the cusp of a revolution in concentrate consumption. Terp slurpers offer a cleaner, more efficient, and enjoyable experience. By preserving delicate terpene flavors and aromas, they provide a more potent experience with less waste and mess. As you explore the benefits of terp slurpers, you’ll likely find that they’re a game-changer for enthusiasts. With their innovative design and ease of use, terp slurpers are shaping the future of concentrate consumption.


